 Why would you want to setup WordPress on your PC? Well there are many reasons and it’s pretty easy to do.
One reason would be to test different themes out. Another would be to try different plugins. Yet another would be to see if you like this thing called blogging and test your wits at writing some blog posts. And yet another reason to run WordPress on your PC would be for software developers who are interested in developing plugins and/or playing around with and learning a thing or two from the WordPress code.
There are a couple ways that I know of right now that work well. The first and the one that I use is XAMPP.
XAMPP is a very easy to install Apache Distribution for Linux, Solaris, Windows and Mac OS X. The package includes the Apache web server, MySQL, PHP, Perl, a FTP server and phpMyAdmin.
You can download XAMPP here at SourceForge.net, the world’s largest Open Source software development web site. When I download XAMPP, I download the executable for Windows. The current version as of this post on SourceForge.net is xampplite-win32-1.6.5.exe. The lite version if for local installs. In other words, for your PC.
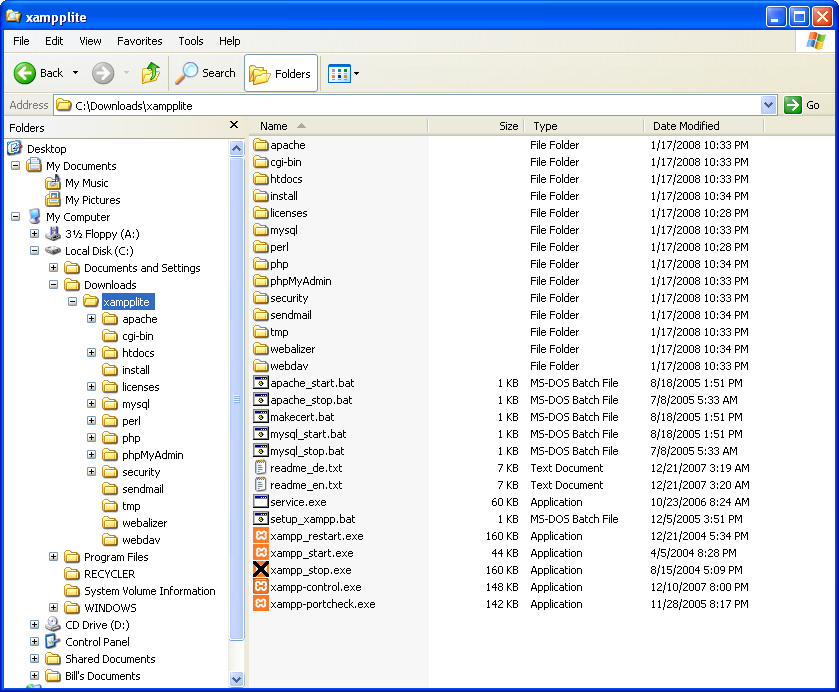
After downloading and double-clicking on this file it will display a screen that asks you what folder you want to extract XAMPP to. I extract it to the root of my F: drive which is a secondary hard drive on my PC. You can certainly extract it to the root of your C:\ drive as well. What you end up with are a bunch of files and folders under C:\xampplite. The folder xampplite will be created for you.
Click here to see a list of Files and Folders. Double-click on the readme_en.txt file to follow the quick install instructions. The beautiful thing about XAMPP is that it is self-contained and can be copied here and there, hard drive to hard drive without affecting the default install. So if you install it on your C: drive and want to move it to your F: drive, you can. All you have to do is run setup_xampp.bat after you’ve copied it over to your F: drive.
When you first run XAMPP you’ll need to do the following just once:
- Double-click on setup_xampp.bat – wait for the “press any key to continue…” and you’re done with the first step.
- Unlike what the readme says, I double-click on the file xampp-control.exe. There will be a window in the lower-right hand corner of your screen that will allow you to start the Apache web server software and the MySql database software.

XAMPP Control Panel with Apache and MySql running.
Next, you’ll want to follow the readme file. Start your web browser, I’m currently using Firefox 2.0.0.11. Browse to http://127.0.0.1/ or http://localhost. You should see a setup page that will guide you through setting up the database for your WordPress install.
- Select your language – English in this case.
- Click on menu selection phpMyAdmin on the left-side of the web page.
- Under “Create new database”, enter wordpress. This will be the name of your database in MySql
- Select utf8_unicode_ci for the collation. This is the last selection in my drop-down list.
- Click on the “Create” button. Your database will be created and a web page will display that.
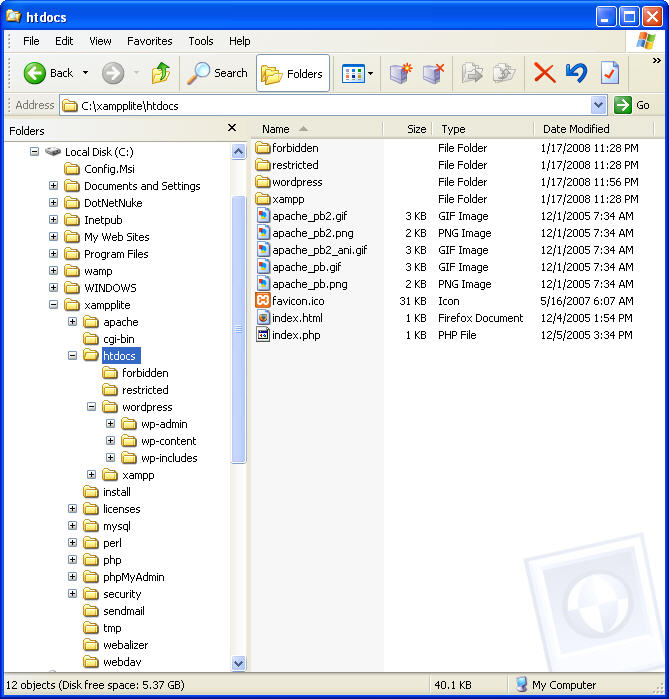
Once you’ve got your database setup, you can download WordPress here. You’ll need to unzip the contents to the C:\xampplite\htdocs folder. Click here to see the final folder structure.
Open the file C:\xampplite\htdocs\wordpress\wp-config-sample.php in a text editor and change the following:
- The DB_NAME will be wordpress in single quotes – ‘wordpress’
- The DB_USER will be ‘root’
- The DB_PASSWORD is blank. So delete whatever you have in there for the password. It should look like this – ”
- Close and save this file as wp-config.php
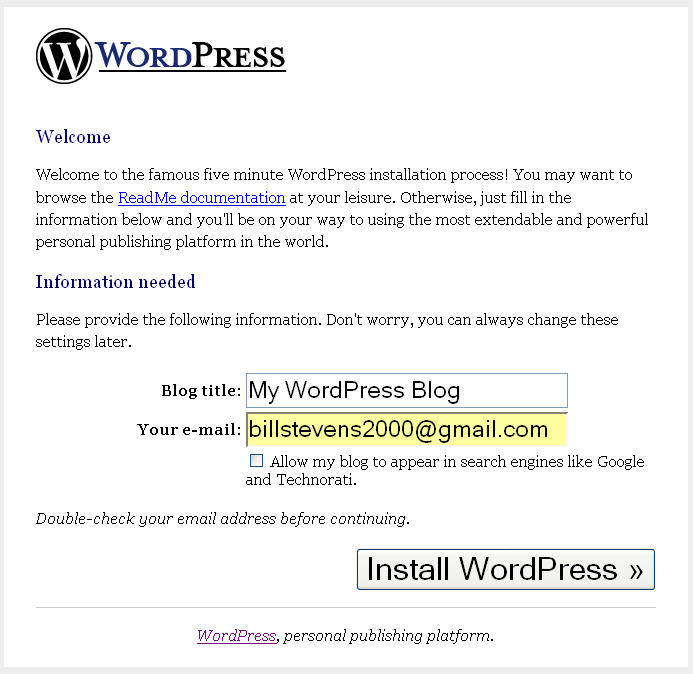
Browse to http://localhost/wordpress/wp-admin/install.php
You should see a WordPress install screen like this. Type in a blog title and provide your email address and click “Install WordPress”. The next screen will display your login and password. Write this information down and click on “log in”.
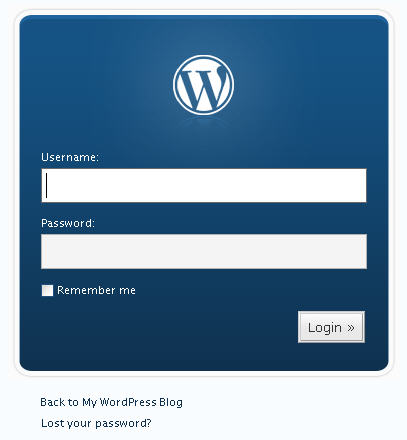
Finally the screen you’ve been waiting for, Ta-Da!!

After logging in you’ll be at your “Dashboard”. Click on “View site” next to the title of your blog for a quick, default view of your blog. Pretty cool. Not the best looking WordPress be nevertheless, we made it. What you’re seeing is considered the default WordPress theme. With the default install of WordPress comes two themes – WordPress and WordPress Classic. Both located under the “Presentation” menu.
But now, let’s browse over to download a more better (advanced english) WordPress theme called GreenTech WordPress theme. This bad-boy theme was created by Mayank Gupta and just released a couple of days ago by DailyBlogTips.
Download it and unzip it to C:\xampplite\htdocs\wordpress\wp-content\themes. You will have a folder structure like this – C:\xampplite\htdocs\wordpress\wp-content\themes\greentech.
There are a ton of WordPress themes scattered throughout the blogosphere. You can search for them on Google or just play around with this GreenTech theme and I’ll provide some other WordPress themes in a latter post you can check out.
So go back to your “Presentation” menu in WordPress and refresh it to make sure you see the new GreenTech – Two Column Widget Ready theme. Click once on it and your blog will now be using that theme. Click on “View site” to test drive it. Again, pretty darn cool if I do say so myself. You can get addicted to trying out WordPress themes which is okay for a while but make sure you get back to your normal routines so you don’t look suspicious hanging out at your PC all day and night.
Click here for a live demo of the GreenTech theme.
[techtags: XAMPP, WordPress, WordPress Themes, Apache, MySql]
Thx for your quick answer !
But I found out the problem : it was the “closering tag” (I don’t know the real name for that : ?>) that was forgotten and I didn’t select the good UTF 8 in creating my database “wordpress”.
It function very well now 🙂
I use xampp and do everything like customizing themes and installing plugins putting some posts to see how it looks and then only I put it on the server. Its recommended if you don’t want to mess up something which whole world sees.
@Amit Sharma: Thanks for stoppin’ by Amit. Nice theme you have over at your blog.
trying to set up wordpress with easy PHP
tried many times will not install says PHP is not running …. canot get to start page
have set up mysql and appache is running
dbase links like in the instructions after a week I am really frustrated
any hints ???
tahnks in advance …. Dave
That was a really well written guide: I’m new to all this, and it worked perfectly – thanks a lot.
Chris » Thanks Chris.
When I go to http://127.0.0.1/ all I get is a blank page with the words “It Works”. There is no set up page to create the database or no PHPMyAdmin. I have tried to follow several tutorials to no avail. Why am I doing wrong?
// ** MySQL settings – You can get this info from your web host ** //
/** The name of the database for WordPress */
// -> Looks good: define(‘DB_NAME’, ‘wordpress’);
/** MySQL database username */
// -> Looks good: define(‘DB_USER’, ‘root’);
/** MySQL database password */
/*** -> -> DOESN’T look good: define(‘DB_PASSWORD’, _”); <- <- ***/ /** MySQL hostname */ // -> Looks good: define(‘DB_HOST’, ‘localhost’);
now im pretty sure i got this right but still get
Error establishing a database connection
any idea?
Good stuff BUT after its all set up when I click the link in Dashboard to see the site I get Index of/wordpress… just a list of files – php files eg wp-activate.php etc- can’t see the actual site.
Hi
Its great and simple tutorial but i facing a problem when try to install.php it shows error
Error: PHP is not running
WordPress requires that your web server is running PHP. Your server does not have PHP installed, or PHP is turned off.
or some codes m facing this problem from last two days plz help me or my file location path is
file:///C:/xampp/htdocs/wordpress/wp-admin/install.php
Plz help me.
Thanks
i see “WordPress requires that your web server is running PHP. Your server does not have PHP installed, or PHP is turned off.” when i run the install file. Any help??
XAMPP is new to my ear. I’m not yet using WordPress, but I want to have it on my PC. I will try to download this tonight, I hope I can do this right.
I have downloaded it to my pc, its working good, also I suggested to my friends thanks for sharing the useful post!!
ServerPress.com’s DesktopServer is xampplite also, but includes a control panel just for creating and copying multiple WordPress localhost sites with their own fake domain names in a couple of clicks.
Minimouse » Sounds good. I’ll be checking that out. Thanks.